Did you know that you can electronically scan and sign important documents on your iPhone? Instead of printing the doc, signing, scanning to your computer and sending back to the sender, follow the below steps on your iPhone or iPad.
To scan the document:
Step 1: Open the Notes app on your device.
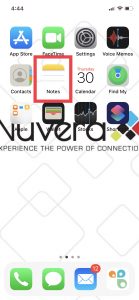
Step 2: Create a new note.

Step 3: Press the Camera button in Notes.

Step 4: Select Scan Documents.

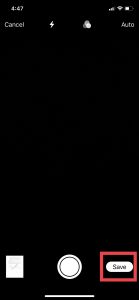
Step 5: Hold the document in the frame of your iPhone screen. The Notes app should automatically scan the document itself, but if not, you can click the Photo button.

Step 6: Save the note.
To sign the document and send:
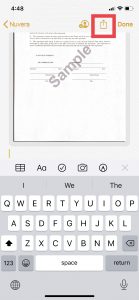
Step 1: Click the share button in the note.
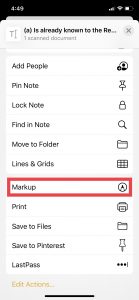
Step 2: Scroll down and select Markup.
Step 3: To add your signature, tap the + button and select Signature.
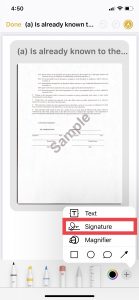
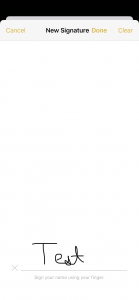
Step 4: Create your signature and click Done.
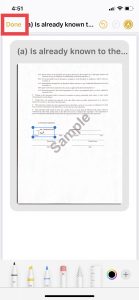
Step 5: Resize your signature and move to where you were supposed to sign.
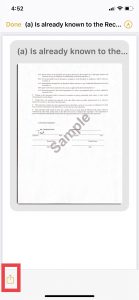
Step 6: Tap the Share button and send back to the sender via the original source (email, text message, etc.) and save the document to your files.
Just like that, you have officially signed and sent an official document via your iPhone or iPad. If the document was emailed to you in a PDF format, you can download the attachment, select the Markup symbol (pen-in-a-circle) in the top right corner, tap the + button in the bottom right corner, select Signature, and finally create or select your custom signature.
If you have any questions on how to do anything else with your electronics, we are always here to help! Get help with any technical questions from our experienced team for as little as $15.
